Deprecated: Optional parameter $prefix declared before required parameter $extension_name is implicitly treated as a required parameter in /home/lagourz/www/wp-content/plugins/mwt-unyson-extensions/mwt-unyson-extensions.php on line 86

Deprecated: Optional parameter $full declared before required parameter $zip_path is implicitly treated as a required parameter in /home/lagourz/www/wp-content/plugins/unyson/framework/extensions/backups/includes/module/tasks/class--fw-ext-backups-module-tasks.php on line 985

Deprecated: Optional parameter $option_id declared before required parameter $value is implicitly treated as a required parameter in /home/lagourz/www/wp-content/plugins/unyson/framework/extensions/megamenu/helpers.php on line 193

Deprecated: Optional parameter $method declared before required parameter $args is implicitly treated as a required parameter in /home/lagourz/www/wp-content/plugins/unyson/framework/extensions/social/extensions/social-facebook/class-fw-extension-social-facebook.php on line 104

Deprecated: Optional parameter $method declared before required parameter $args is implicitly treated as a required parameter in /home/lagourz/www/wp-content/plugins/unyson/framework/extensions/social/extensions/social-facebook/helpers.php on line 17
To Cook – La Gourmandista

Cooking in progress...

Categoría: To Cook

Love Pizza? Here one that is Delicious and Effortless

Let’s be honest, who doesn’t suddenly crave pizza as soon as you know there’s a BOGO deal out there, or on Friday evening, or on Saturday, or even on Sunday? I mean, we could all order a pizza delivery or carryout form our preferred chain, or if we are plenty lucky, the neighborhood pizzeria serving it from a wood-fired oven and with our ingredients of choice. In reality, it’s not always what we’re craving. We sometimes want to prepare them ourselves at home, and why not, include everyone in the family in the feat.

Now, this pizza dough recipe requires very little. However, there are a couple VERY important requirements I will insist on: TIME and a SCALE. And even when you could prepare the dough using measuring cups and spoons, I will totally insist on using the scale as this will help you obtain the best result possible.

Pizza Dough

Having this recipe at hand requiring so little effort will make everyone help out to prepare delicious homemade pizzas.

  • Medium bowls
  • Silicone spatula or wooden spoon
  • pizza stone
  • Pizza Peel
  • 115 g. all-purpose flour
  • 1 g. instant yeast
  • 5 g. sugar
  • 5 g. salt
  • 2.5 ml. olive oil
  • 80 g. water at room temperature (25°C or 70°F approximately)
  • olive oil or cooking spray for the bowl
  1. Prepare this dough before shaping. For better flavor development, rest for 12 to 24 hours.

  2. In a medium bowl mix the flour, instant yeast, sugar, and salt. Form a well and in the middle hole add the water and olive oil. With a silicone spatula or a wooden spoon, incorporate the flour into the liquids little by little to hydrate the dry ingredients and form a dough. This will take about 20 seconds. It should come off from the bowl, but still be a little sticky. It won't be silky smooth, though. The texture will still be a little rough and that's fine.

  3. Knead with your hands for about 3 to 4 minutes to integrate the lot and make it a homogeneous dough.

  4. Let the dough grow. Smear a little oil to a second bowl (you may spray it with some cooking spray if you'd rather) and place the dough ball in. Toss the ball around the bowl to cover all its surface with oil. Cover with plastic wrap and let it rest on top of the kitchen counter for at least 1 hour and up to 24. It should at least double it size.

  5. For better flavor development, prepare the dough at least 12 hours prior to its use. I like resting my dough for 24 hours in the refrigerator, and later on I let it soften and come to temperature on the counter for 1 hour.

  6. While the dough is resting, prepare the tomato sauce, if you're using, as well as the toppings you'll be dressing your pizza with. Remember that you should cook all toppings ahead, as the time the pizza will be in the oven won't be enough for them to be cooked through.

  7. Preheat your oven at 260 °C (500 °F) one hour before you want to put your pizza in. Place an oven rack at the highest position possible and then place a pizza stone or a baking sheet upside down if you don't have a stone or a baking steel.

  8. Dust your working surface with a little flour and take the dough out of the bowl. Lightly punch the gas out and form a disk with the dough. If you'd rather use a rolling pin, you may do so as well. Extend the dough as thin as you wish. If the dough bounces back or it's difficult to work with, let it rest for a few more minutes. Use additional flour, as need there'd be, to avoid the dough from sticking to the table.

  9. Dust a pizza peel or a second upside-down baking sheet with some cornmeal and place the dough disk on top. Smear a little olive oil on the dough, add the tomato sauce and whatever toppings you've chosen, and finish off with some cheese. Cautiously shake the pizza peel or the baking sheet -whatever you're using- to be sure the pizza is not sticking to the surface and you can slide it into the oven.

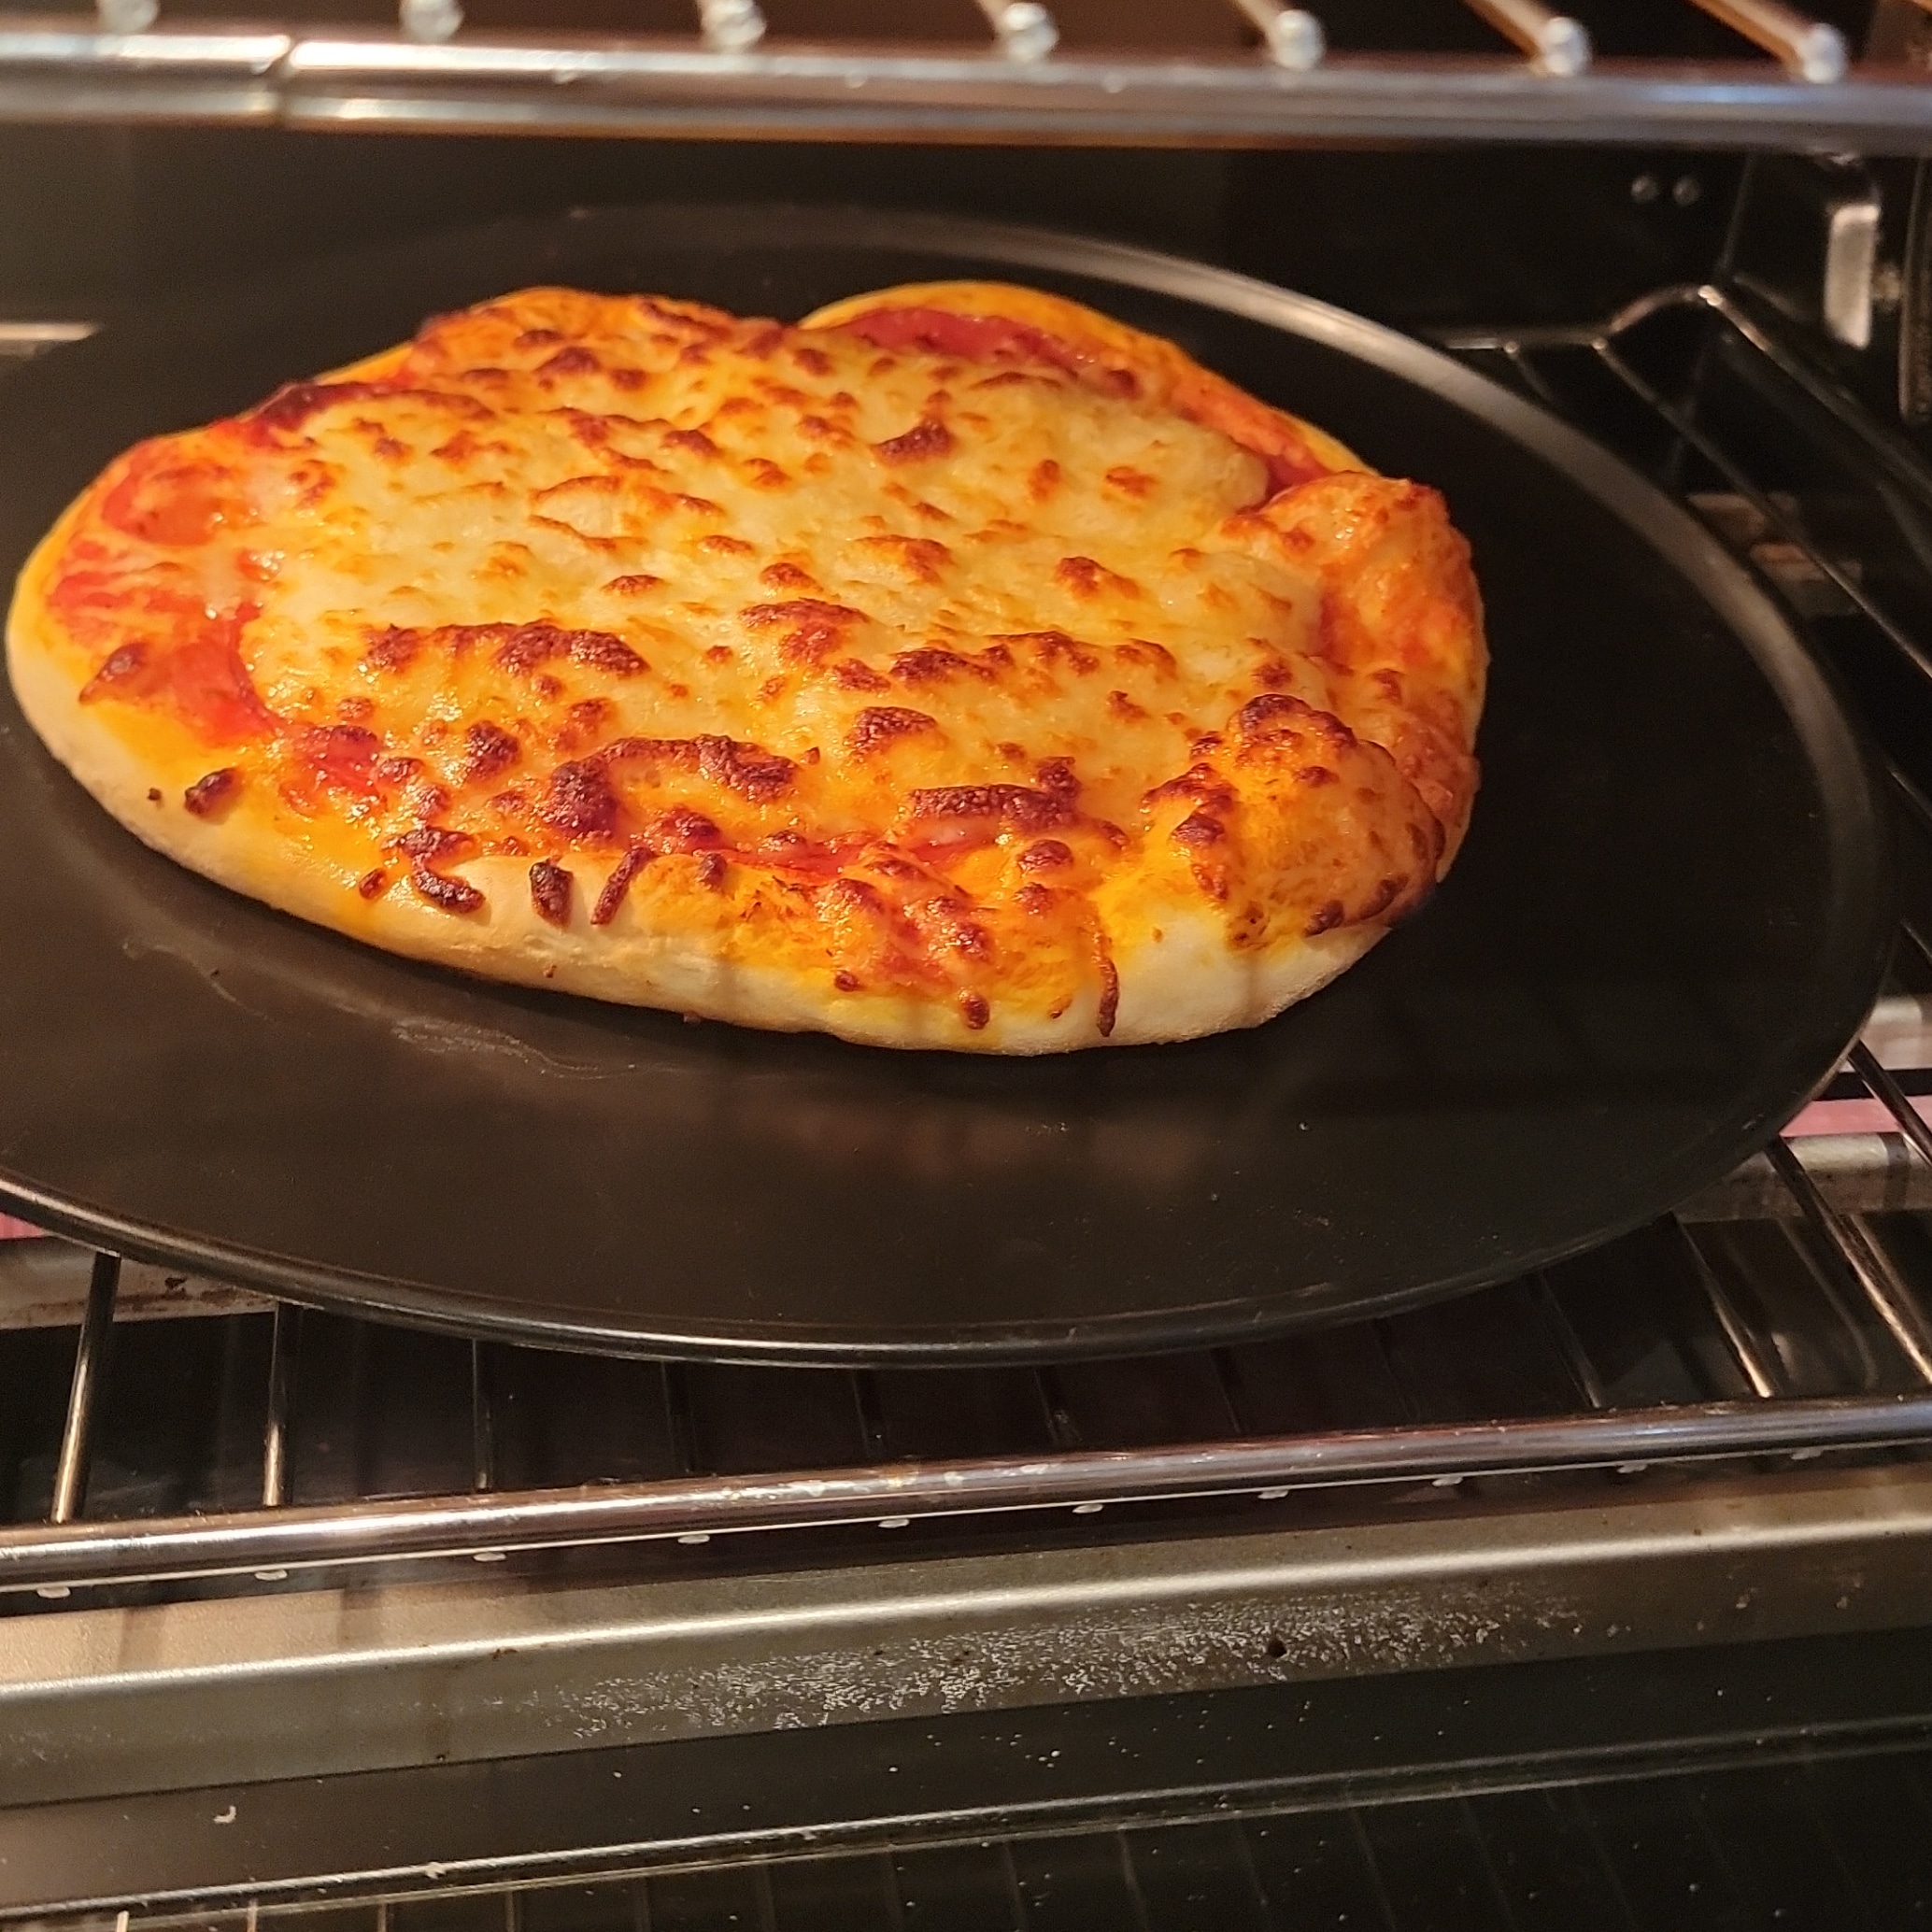
  10. Deslice suavemente la pizza sobre la piedra para hornear caliente y hornee durante unos 5 minutos o hasta que el queso se derrita y la corteza esté bien dorada.

You may use different kinds of flour, such as 00, all-purpose, or bread. A good recommendation to begin variations in the pizza texture is to use 50/50 ratio of 00 and bread flour. 

Main Course
Italian
pizza, pizza dough

A Chipotle Shrimp or Lobster Roll?

This Summer I have been revisiting the classics. I think that my Cooking Me is evolving and is now appropriating recipes I hadn’t had the courage to modify before. And in the same way as we’ve been doing at home for the last couple of years the tuna tostadas arrive to the table just as the Summer begins all the way to the last rays of sun in the Fall, the last couple of months I have been in a seafood salad mode. It’s all been about the ceviches, the tiraditos, and the seafood salads. Therefore, today I want to share the last version of the shrimp roll I prepared that tweaks the one I ate in the New England coast a long time ago and which had been made with lobster. I must confess, however, that finding lobster tails was impossible for some strange reason, so I decided to make them with shrimp. It seems everyone in the neighborhood had the same wicked lobster craving I had, so, I decided to change it up a bit more.

Chipotle Shrimp Roll

With shrimp, lobster, or whatever you have at hand, but this roll is one you must try.

  • Chopping board
  • Chef's Knife
  • Pairing knife
  • Peeler
  • Medium Pot
  • Immersion blender with its glass
  • Medium bowl
  • Salad serving utensils
  • 500 g. jumbo shrimp (peeled, cooked, and diced)
  • 2 sticks celery (peeled and finely diced)
  • ¼ cup fennel (peeled and finely diced)
  • ¼ cup radishes (finely diced)
  • parsley (finely chopped)
  • 1 piece lime (the juice)
  • ½ cup mayonnaise
  • 1 piece chipotle chili in adobo
  • 4 pieces hot dog buns (New England style)
  1. In the glass of a food processor or an immersion blender (being the latter my personal choice), add the mayonnaise and the chipotle chili in adobo. Pulse until both ingredients blend and incorporate fully. If you'd rather, you may do the mayonnaise from scratch, but it isn't necessary if you don't want to.

  2. Add the cooked shrimp and the vegetables to a medium bowl and bind everything with the mayonnaise and lime juice. Season with a little salt and enjoy in a bun, but… among us friends, you should know that you can also put the salad on some crunchy corn tostadas and it will work perfectly.

  3. By the way, if you'd rather make them with lobster, I suggest using between 3 and 4 lobster tails for this recipe, depending on the size.

Sandwich
American
lobster roll, my recipes, New England, shrimp roll, summer

On the Original Caesar’s Salad, Homemade

As a child, I used to when the Maître D’ would to come to our table and do something. I didn’t mind if he prepared a salad, a flambéed dessert, or if he only came to cut the piece of meat my parents had had asked for and would share. My curiosity was enormous, and I must say I thought it was delightful. Of course, at each restaurant I would have my own personal favorite. There was the place where I liked to ask for strawberries jubilée. Somewhere else, my choice would always be a zabaglione. Nonetheless, the Caesar’s Salad might have been the ultimate favorite. It was something we never prepared at home. It was something simple, yet for me it was a show in itself. As a matter of fact, I remember my father once told me it wasn’t but lettuce with cheese and a few slices of bread.

It called my attention that I could find it here and there nation-wide, as well as abroad. Nevertheless, there was something inside me that complained, for it was never prepared just as we did it back home. Someone -which might have been my mother- told me it had been invented in Mexico.

In time, I was able to confirm the information, and even learned that it wasn’t just Mexican, but from Tijuana. As I had never been there before, I hadn’t been able to taste the original version. Now, last Spring, I was able to go there to visit my stepdaughter. She made it our first stop in the trip. It was like traveling in time.

Once you get there, the charriot in charge of traveling from one table to the next is right in front of you, and it’s loaded up with ingredients to prepare the famous salad. Here, the main difference with my experience as a child is that everyone at the restaurant knows how to prepare it as per the house’s recipe. Evidently, I asked for mine. I confirmed that my ingredient list is correct. I noted some slight differences. For example: I don’t add garlic to mine. I always put yellow mustard instead of Dijon. I use the whole egg, whereas at the restaurant they only use the yolk. I do add an anchovy filet and I asked why they don’t. I was reassured that the Lea & Perrins Worcestershire Sauce has anchovy and therefore it isn’t necessary. I admit that the result is quite similar, but I guess that if I want to imitate the original dish, I must slightly modify my recipe. Among us friends, I will change the type of mustard immediately, for I like more the French rather than the English sauce.

Once we were served our salads, I asked the garçon which of all legends regarding the creation of the salad was the one considered as the real one by the organization. He honestly didn’t give me a straight answer. However, he did confirm though the “official legends”. But before I go into the nitty gritty of the gossip, let me tell you a bit about the history of the man who allegedly created it, and obviously, the gossip.

The Caesar’s restaurant is located on Avenida Revolución, in downtown Tijuana, Baja California. It’s actually no that far from the Mexico-United States international border. The place was founded by an Italian-born restaurateur named Cesare Cardini. He had originally migrated to California from Italy, but he then decided to press his luck in the Mexican border city as he was escaping from the alcohol prohibition in place in the United States in 1919 after the 18th Amendement made to the Constitution became effective. Said law prohibited all alcoholic beverages from being consumed, thus giving the city of Tijuana the chance to live years of glory and abundance. It also became a place that the American society cherished, as everyone started to cross the border to go party.

Evidently, then, just as now, festivities for the 4th of July are an opportunity for all Americans to celebrate, and obviously, crossing the border when not even a beer was allowed would be mandatory if one would want to party with the refreshing beverage in one’s hand. Therefore, Mr. Cardini, having his restaurant open and continuously full, started to run out of ingredients. Among one of the popular legends, it is said that a group of aviation officials arrived, and having nothing to offer them, Alex Cardini, brother of Cesare, and who was in charge of the kitchen the day in question, mixed the ingredients that today make up the famous salad and the rest is history.

Another legend says, that yes, there wasn’t much to offer guests, and the idea came from one of the servers, also from Italian origin, and whose mother used to prepare said recipe back home in Italy. As they saw everything was available in the pantry, the Cardini family prepared it, and then appropriated themselves with the recipe.

The last one of the stories was in fact the one our server told us. I honestly felt it was even more fascinating, as when I asked if the legend was true, he immediately started to narrate it and I didn’t stop him. We just listened and sat there with our mouths wide open. It is said that among the rich and famous who visited the Caesar’s restaurant there was a lady who always came by the restaurant and ordered it. She used to like it so much, she would go to different places around the World and ask for the dish to be reproduced. Her name: Wallis Simpson. Yes, ladies and gentlemen, the same lady who was originally from Baltimore, Maryland and who turned upside down the English Crown… to the point that the new king, Charles III, sits at the throne because of the marriage of Mrs. Simpson and the king who abdicated the crown, Edward VIII, his great uncle.

See? I told you the gossip was good. Anyhow, God knows which one of them all is the true story of the Caesar Salad. Maybe in each one of them there is a little bit of truth. The best of it is that even when the place had fallen into ruins, Javier Plascencia, a chef originally from Tijuana and a great representative of the region and its cuisine, together with this family, who’s in charge of a restaurant group, decided to rescue the place that today vibrates with the rest of the city and carries on reminding us that THIS IS the place of birth of one of the most emblematic dishes of the Western Cuisines of the 20th Century.

Lastly, I read somewhere that the Cardini family, upon their return to the United States had sold the recipe to make a bottled version of the dressing. And yes, curiosity killed the cat and I looked for it at a local supermarket. I found it, we tested it, and the consensus at home was that we prefer the homemade version or that of the restaurant.

Here, I share with you the brief video I recorded that day. Then, you’ll find the recipe I usually make at home whenever I can’t go all the way to Tijuana.

The Recipe

Homey Caesar Salad

The classical dish served at the Caesar's Hotel in Tijuana in a version that my mind recreated from memories of my childhood and restaurants from the 80s in Mexico City.

  • small pot
  • small bowls
  • Salad bowl
  • Fork
  • Whisk
  • Kitchen Tongs
  • cheese grater
  • 2-3 leaves lettuce (romaine)
  • 1 filet anchovy
  • ½ tsp Dijon mustard
  • 1 egg
  • 1 tsp Worcestershire sauce
  • ½ lime (the juice)
  • 3 TBSP. olive oil (extra virgin (approximately))
  • ¼ cup Parmigiano Reggiano (finely grated)
  • 2-3 bread croutons
  1. In a small pot with water, add an egg and let it come to a boil. As soon as the boiling starts, leave for one minute and bring it out. Submerge the egg in iced water to stop the cooking. (By the way, you may also use the raw egg, but be careful. Also, if you don't like raw eggs, this is a good option to have it partially cooked).

  2. In a big bowl or a salad bowl, and with the help of a fork, mash up the anchovy filet.

  3. Add the Worcestershire sauce, the lime juice, the Dijon mustard, and a teaspoon cheese.

  4. Emulsify all ingredients with the whisk.

  5. Add the soft-boiled egg and then emulsify with the olive oil using the whisk by adding the oil as necessary. The recipe asks for three tablespoons, but you may use a little more if you'd rather. Verify seasoning with salt and pepper.

  6. Roll the lettuce leaves around the salad bowl to dress them well.

  7. Serve in a plate and finish with the amount of Parmigiano Reggiano you desire. Add a few croutons.

  8. If you want to prepare the croutons yourself, a very easy way I like is to cut a few slices of baguette, smear some butter and garlic salt, or some salted garlic paste, sprinkle some grated Parmigiano Reggiano and toast them a little in the toaster oven. They come out delicious and it takes 2 minutes.

Salad
of the World
Caesar, classic, Salad

Lastly, if you go to Tijuana, don’t miss the Caesar’s. Gon and enjoy a Caesar’s Salad. The map to get there is below. Save it!

Conchas: The Favorite Mexican Sugar Bun

As a child, one of the activities that we would always do on Sunday afternoon was to stop by the bakery and buy bread for the week. My mom was usually the one in charge of the tray and the tongs. The rest of the family would wander around the hallways to see what we would fancy. Sometimes we may influence on the selection, but this wasn’t possible. We would surely add to the tray some muffins and a few croissants for supper. Now I must say that back then, conchas were not my first choice. I preferred garibaldi bundt cake muffins. In time, this has changed.

Nowadays, baking bread is something I enjoy immensely. And even when we try to not eat a lot of it in order to look after our carb and added sugars intake, conchas are an Achiles’ Heel. So, we allow ourselves to bake a batch or two throughout the year.

Conchas

The most delicious enriched bun… Well, I think that, haha!

  • Scale
  • Stand mixer
  • Hook attachment for the stand mixer
  • Plastic dough scraper
  • Big Bowl
  • Medium bowl
  • Silicone spatula
  • Pastry brush
  • Concha cutter
  • Baking sheets
  • Plastic wrap
  • Clean and dry tea towels
  • 500 g bread flour
  • 100 g granulated sugar
  • 9 g dry active yeast
  • 2 eggs
  • 15 ml vanilla extract
  • 200 ml whole milk
  • 8 g salt

For the sugar crust:

  • 100 g unsalted butter
  • 100 g powdered sugar
  • 100 g all-purpose flour
  • 15 g cocoa powder (* optional if you want to do chocolate crusted conchas )
  • 10 g matcha green tea (* optional if you want to do matcha green tea conchas )
  • 30 ml whole milk

Prepare the dough:

  1. In a stand mixer fitted with the hook attachment, combine bread flour, eggs, vanilla, sugar, active dry yeast and half the amount of milk. Once everything is hydrated and integrated, add the butter, and finally add the salt.

  2. If necessary, add the rest of the milk little by little. If not, continue kneading the dough to develop the gluten until you get an elastic window pane.

First fermentation:

  1. When ready, pour into a large bowl previously greased with a little vegetable oil, cover with plastic wrap and let it slowly proof in the refrigerator for 12 hours.

Second fermentation:

  1. The next day, portion the dough into balls of approximately 60 to 80 grams and cover with clean tea towels.

  2. Let them proof for an additional hour on the kitchen counter or 45 minutes in the fermentation chamber.

Prepare the sugar crust:

  1. In a bowl, mix the butter, powdered sugar, and all-purpose flour. Add a little the milk only if it's necessary.

  2. If you are going to prepare crusts with chocolate and/or matcha green tea, divide into two or three parts and add the cocoa and/or matcha green tea and a dash of milk if necessary, mixing well to make a hydrated paste that isn't either sticky or chewy.

  3. Divide the crust into enough portions to cover the buns and flatten with your hands or with a rolling pin. I regularly refrigerate the crust, in order for it to harden a little and then I flatten it with the help of the rolling pin, in between two sheets of parchment paper. (Watch from minute 20 of the video for further reference)

Finish the conchas:

  1. Brush some egg wash on top of the buns, paste the sugar crust, mark with the shell stamp if you have it on hand and dust with a little flour and sugar.

  2. Bake at 170 °C or 325 °F for approximately 15 minutes.

Preheat oven to 170 °C / 325 °F

Bread Baking
Mexican
bread baking, Mexican bread baking

Below, you can watch my last batch of conchas. These are vanilla flavor and the décor I made since I have no concha stamp was with some cherry blossoms. Very adequate for the springtime.

A small difference you’ll see is that for this batch I prepared a sponge pre-ferment. In the end, there’s no difference, but you’ll have an additional approach to the recipe.

The video is in Spanish, but I have made sure to add the subtitles in English. So, activate them and enjoy.

The Granola of the House

I know, I know. My title today is suuuuper cheesy and obvious. I DON’T CARE. This is our granola at home. It is the one we have for breakfast EVERY DAY. And I promise you it’s delicious. Okay, let’s try this once more. I think I might have overreacted.

Today I’m sharing a recipe we completely love at home. It’s actually part of our every day breakfast. As a matter of fact, every time I prepare it -every 10 days or so, I make a double batch and it’ll be good for those ten days only. I mus confess that sometimes I will eat my fruit just because I want the granola. I’m going to ask my husband if he is more disciplined, or if he does the same, haha!

Now, let me tell you a bit about how I got to this delicious mix. Well, I think it’s delicious. I hope you get as big a hearty pamper when you have it as well. When I started reading the labels of everything I was buying at the grocery store, I started becoming conscious about all the ingredients in the products we didn’t need to eat. I have stopped buying many if not all of those products and they haven’t found their way back home. But let us focus. We can talk about that some other time.

Then, at work we needed one day some granola and my chef proposed that instead of buying it, we taught the children to prepare it by doing a quick demonstration. We agreed then on the ingredients and prepared it every chance we got. The kids were at awe and the parents came back to ask for the recipe since this one wasn’t on their recipe packets they each received after class. Everyone who asked me, got it verbally. I then immediately decided to do the same at home.

So, this is the recipe I ended up writing according to our dietary needs and taste. You may adjust it to more or less cereal or grains as per your habits.

Granola

Some might say this is a keto recipe. Others will think it's paleo. And yes, there will be those who will classify it as low-carb. For us, it's simply our recipe of the house. If you want to adapt it to your taste, go ahead. Don't hesitate!

  • Big Bowl
  • Measuring cups and spoons
  • Baking sheet
  • Clear glass jar with lid (Mason Jar or similar)
  • 1 cup rolled oats
  • ¼ cup almonds
  • ¼ cup pecans
  • ¼ cup walnuts
  • ¼ cup hazelnuts
  • 2 tablespoons pumpkin seeds
  • 1 tablespoon sunflower seeds
  • 1 tablespoon chia seeds
  • ¼ cup shredded coconut (unsweet)
  • ¼ cup craisins
  • ¼ teaspoon salt
  • 1 tablespoon honey
  • 1 teaspoon ground cinnamon
  • 1 teaspoon vanilla essence
  • 1 tablespoon grapeseed oil
  1. Add all dry ingredients (rolled oats, almonds, pecans, walnuts, hazelnuts, pumpkin seeds, sunflower seeds, chia seeds, shredded coconut, craisins, salt, and cinnamon) to a big enough bowl and mix.

  2. In a smaller bowl mix the vanilla essence, grapeseed oil, and honey.

  3. Incorporate the liquid mix to the dry ingredients and mix well. Place on a baking sheet with parchment paper.

  4. Bake for about 25 minutes. It should get golden toasted.

  5. Take out of the oven and let it rest for 10 minutes. You may serve it or use it immediately or you may store it in an airtight glass container such as a Mason Jar once cooled down.

Preheated oven at 140°C (325°F)

Breakfast
breakfast, cereal, granola

Tender Cactus: The Most Popular Cactaceae from Mexico

As a child, reunions around the grill on the weekend were frequent. It could be at home with family or out with friends. Nonetheless, at least once a month, someone would host one of these gatherings. There, I would always run to get carne asada, quesadillas, and grilled spring onions. However, the one thing I would never be curious about but which generally made an appearance was the tender cactus paddle, better known as nopales or nopalitos. I think the goo that expels was something that threw me off. Now, I learn I was not alone in that road, that there are many who feel the same way. Yet, I don’t remember exactly when I let nopales become part of my diet.

By 2011, cactus paddles and I had become good friends. Happily and full of pride, I would share them with anyone who would come home to have a Mexican bite. And I just remember one person who tried them and didn’t like them. She ate them, but I could see they were not going to be her cup of tea. Now, if I compare my recipe repertoire from back then to my current one, clearly it was poor, and my options were limited back then. I would normally serve them in a salad. Aslo, one should take into consideration that finding them fresh in Europe wasn’t easy those days. So, I would normally use them in their pickled presentation or preserved in a jar.

And even when returning to my Aztec land of origin helped me learn how to incorporate this plants in many more ways, it wasn’t until we learned about the multiple health benefits offered by it that we truly embraced them and started to eat them almost on a daily basis, even when far away.

What is nopal and where does it come from?

It is true, all research points toward nopal being mexican. As a matter of fact, the name we has its origin in the nahua voice nopalli, even when the different indigenous languages have their own word for it. From the cactaceae family, the opuntia ficus-indica apparently arrived to Europe from the hand of the Spanish conquistadors who wanted to make the most of the Iberian peninsula land that was low-produce. They, as well, introduced it later to Spain and Northern Africa. I, nonetheless, don’t see any of them eating it as much.

The consumption of nopal is immensely popular all through the Mexican territory. It is however, very easily found everywhere through the continent. Thus, depending on where one is in the Americas, the name of the tender cactus paddle will change. For example, in Argentina, Paraguay, and Ecuador, it is called “tuna”, while in Uruguay and Colombia it is called “higo tuna”. In Mexico, the word “tuna” will refer exclusively to the fruit, the prickly pear. But we’ll talk about that on another entry.

Data to Learn about Nopales

Its flavor is fresh and slightly acidic. They are available between June and October. The Winter is when they will be scarce due to the cold weather and low temperatures. Hence, the most common way to eat it is on the grill, charred, and blanched. Yet, raw can also be eaten and it is delicious as well.

Among the most popular reasons to incorporate this cactaceae to one’s regime are the health benefits, I must admit. Fully charged with antioxidants such as Vitamin A, B, and C, nopales are an excellent source of dietary fiber and hydration.

I reflect again. I think I find the moment when I came to peace with nopalitos.Discovering hey were great to lose weight because of said amount of fiber and low caloric intake and learning they help control blood sugar levels as well as cholesterol and triglycerides sounds like a great deal, doesn’t it?

On Choosing, Buying, and Preparing Nopales

Everything is a lot easier than you’d think. Promise. To choose them, just select the vivid green meaty ones without any wrinkles. That is enough to guarantee freshness. Now, if you are in Mexico they can be easily found at markets and supermarket. Just be attentive to find them. Also, they will mostly be sold de-thorned, so they are clean and ready for you to rinse them and use them for your meal.

If you’re abroad, it’s a whole other story though. Specialized stores carrying Latin American products will be the best choice if not specific vendors near you. Some will sell them ready to be used, but my perception and experience say otherwise. So be careful when you clean them. But I will leave it at that for the moment, for I recently found a new tool to test and looks promising. If it’s really the last panacea, I’ll share everything about it.

Lastly, how to eat them. Well, there are some who will use them raw in juices, smoothies, and salads. In my experience, we consume them more if they are cooked. The easiest and most foolproof method might be grilling them, for the goo will disappear. Also, there are people who blanche them with different concoctions to cut the goo. A friend of mine taught me how to cook them, and this is the way I’ve done them ever since. After carefully cleaning all my paddles, I dice them and put them in a skillet. No fat, no water, nothing. Just a medium-high heat and patience. I let them cook in their own liquid -the viscous goo that will be expelled thereof. I let them dry but not stick to the pan. It’s important to not let them toast. Then, just store them in an airtight container in the refrigerator, and use as needed.

And now, do you love nopales, or will you give them a chance?

Chicken Al Pastor (Shepherd’s) Tacos

I’m going take a chance here without any certainty or specific data, but Al Pastor Tacos may be the most popular in Mexico City. At least, that’s what I want to believe. For some reason, I learned a little about how they came about. It turns out I met someone related to the founders of Taquería El Tizoncito in my hometown. They say, they were the ones who invented them. It even says so in their brand’s tag line.

There is, however, little documentation that will help me find if this is totally true. What I do know it that this taco is strictly related to a Lebanese migration which arrived in Mexico. And, should I not be wrong, it was in the 60s when they adapted the Middle Eastern shawarma to ingredients and spices of Central Mexico.

Now, if we put them on a head-to-head. Shawarma is with lamb, while pastor is pork. Nonetheless, in time, it evolved again. Restaurants began to offer a chicken version. I wonder if it had to do with kosher and halal diets getting momentum as well. Maybe.

So, as I prepared the chicken shawarmas my Jewish friend shared with me, I thought that for this year’s Judaic festivities I could share this delicious recipe with the family and travel in some way to the Middle East via Mexico. Traveling through food is always a good option, and today is with two stops, I may say.

By the way, and if you fancy it. These tacos can very well have the pickled jalapeno rounds and veggies I shared around here a good while ago on the side. I’m going to leave easy access to that recipe here in case you need it.

Al Pastor Chicken

The perfect option for everyone who prefers chicken or whose lifestyle avoids eating pork.

  • Small saucepan
  • Blender
  • Kitchen spoon or silicone spatula
  • Big Bowl
  • Baking sheet with rack
  • Cast Iron pan
  • 5 pieces Guajillo peppers (deseeded and deveined)
  • 1 cup water
  • 5 tbsp apple cider vinegar
  • 3 cloves garlic
  • 1 pinch cumin (ground)
  • 2 cloves
  • 1 slice pineapple (2 cm thick (3/4 inch))
  • 6 chicken thighs with skin and bones
  • 1 onion (thinly sliced)

To Serve:

  • 12 corn tortillas
  • 2 slices pineapple (cubed)
  • 1/2 onion (finely chopped)
  • Limes
  • Salsa verde or salsa roja
  1. Add the clean chiles in a small saucepan and cover with water. Let it come to a boil. Turn off, and let the chiles hydrate about 15 minutes.

  2. Place the garlic, cloves, pineapple, hydrated chiles and ¼ cup of the water where the chiles were hydrated in the blender glass.

  3. Blend the lot. If necessary, add a bit more water. Taste it, and if you feel it too spicy, add a dash more vinegar.

  4. Place the chicken pieces previously pat-dried in the bowl and season them over and under with salt.

  5. Finely slice the onion and add it on top of the chicken.

  6. Pour the thick sauce gently while mixing with the spoon or spatula.

  7. Once everything is covered with the adobo sauce, cover with plastic wrap and leave it in the refrigerator for at least 8 hours.

  8. Preheat your oven at 180 °C or 350 °F. Then, set your cast iron pan on the stovetop to heat as well with a drizzle of oil.

  9. Drip the chicken pieces on a baking sheet with a rack on top.

  10. Sear the pieces, one by one and on both sides starting on the side of the skin. Once well seared, set aside on the rack the pieces once more.

  11. Once all the chicken pieces are seared, sweat the onion with a pinch of salt. It won't need much time. Maybe just a couple minutes.

  12. Distribute the onion throughout the pan's surface and the chicken pieces in one even layer. If you need to use a second pan, use it.

  13. Bake for about 20 minutes. Verify the chicken is cooked to 75 °C or 165 °F.

  14. Personally, I like serving the pieces already deboned. So what I do is debone and either cut or mix the meat to mix with the now caramelized onions for my guests to prepare their tacos family style.

* This recipe is adapted from the Tacos al Pastor recipe from the book Mexico: The Cookbook, Margarita Carrillo Aponte, Phaidon.

Main Course
Mexican
al pastor, chicken, tacos
es_MXSpanish